
作者について
こんにちは。 私はダニエルで、ウェブのためのものづくりをしています。 KinstaのCTOであり、Smashing Magazineや…More aboutDaniel↬
- 15分で読める
- WordPress,Techniques
- オフラインで読めるように保存されている
- Twitterでシェアする。 LinkedIn


WordPressは、数年前から一般的なコンテンツ管理システム(CMS)のゲームで足場を固めてきましたが、本当のブレークスルーは、多様なコンテンツを作成できるカスタム投稿タイプのメカニズムでした。
WordPressで作成できるカスタム投稿タイプの一部をご紹介します。
What It Used To Be Like
実際には、カスタム投稿タイプは長い間存在しており、より具体的には、WordPress 1.5が静的ページのサポートを追加し、post_typeデータベースフィールドを作成した2005年2月17日以降に存在しています。
Further Reading on SmashingMag:
- Extending WordPress With Custom Content Types
- A Detailed Guide To WordPress Custom Page Templates
- Customizing WordPress Archives For Categories, Tags
- Building A Custom Archive Page For WordPress
wp_insert_post()関数は、WordPress 1.0から存在しています。そのため、1.5でpost_typepost_typeの値を設定するだけでよかったのです。
バージョン 2.8 では、register_post_type() 関数やその他の便利な機能がナイトリービルドに追加され、2.9 になると誰でも使えるようになりました。
WordPress でできること
カスタム投稿タイプとは、通常の投稿に異なる post_typepostpageattachmentなどとなっています。 作成されたコンテンツのタイプを示すために、独自のものを作ることができるようになりました。
正しく作成されていれば、数行のコードで次のことが実現できます。
- カスタム投稿タイプは、独自の投稿リストと「新規追加」ページを持つ独立したメニュー アイテムとしてバックエンドに表示されます
http://mysite.com/customposttype/に移動すると、その投稿タイプのアーカイブ ページに移動します。- カテゴリーやタグをカスタム投稿タイプで利用できるようにしたり、カスタムタクソノミーを作成することができます。
これらに加えて、カスタム投稿タイプをメニューのどこに配置するか、検索可能にするか、どのユーザーレベルがアクセスできるか、階層化するか、カスタムリライトルールなど、無数のオプションを変更することができます。 通常の投稿であれば、著者、カテゴリー、日付などを指定したいでしょう。 本」のカスタム投稿タイプでは、理想的には、本の著者、ページ数、ジャンル、出版社、その他の本特有のデータを指定するオプションがあるとよいでしょう。
カスタム メタ ボックスを使用すると、投稿の編集画面に追加のボックスを追加することができます。 通常はカスタムフィールドを使用するので、カスタムフィールドだけでもいいのですが、一部のカスタムフィールドをメタボックスとして切り離すことで、よりスムーズで使いやすい管理画面を作ることができます。
Working With Custom Post Types
カスタム投稿タイプを効果的に作成、使用するためには、以下の知識が必要になります。
カスタム投稿タイプの作成
最初の議題は、投稿タイプ自体の作成です。 理想的には、カスタム投稿タイプを扱うときはプラグインを作成するべきですが、方法がわからない場合や、簡単なテストが必要な場合は、テーマ内の functions.php ファイルを使用することができます。
function my_custom_post_product() { $args = array(); register_post_type( 'product', $args ); }add_action( 'init', 'my_custom_post_product' );最もシンプルな形で、ほとんどカスタマイズされていない投稿タイプを作成します。 公開されず、管理画面にも表示されず、相互作用のメッセージは投稿と同じです(「post saved」、「post updated」など)。 新しい投稿タイプをニーズに合わせて調整するために、より頻繁に使用されるオプションのいくつかを説明し、以前は空だった $args 配列に追加します。
function my_custom_post_product() { $labels = array( 'name' => _x( 'Products', 'post type general name' ), 'singular_name' => _x( 'Product', 'post type singular name' ), 'add_new' => _x( 'Add New', 'book' ), 'add_new_item' => __( 'Add New Product' ), 'edit_item' => __( 'Edit Product' ), 'new_item' => __( 'New Product' ), 'all_items' => __( 'All Products' ), 'view_item' => __( 'View Product' ), 'search_items' => __( 'Search Products' ), 'not_found' => __( 'No products found' ), 'not_found_in_trash' => __( 'No products found in the Trash' ), 'parent_item_colon' => ’, 'menu_name' => 'Products' ); $args = array( 'labels' => $labels, 'description' => 'Holds our products and product specific data', 'public' => true, 'menu_position' => 5, 'supports' => array( 'title', 'editor', 'thumbnail', 'excerpt', 'comments' ), 'has_archive' => true, ); register_post_type( 'product', $args ); }add_action( 'init', 'my_custom_post_product' );-
labelsオプションは、カスタム投稿タイプが持つことのできるさまざまなラベルを定義する配列でなければなりません。 -
descriptionカスタム投稿タイプについての簡単な説明、何をするのか、なぜそれを使うのかを説明します。 これを true に設定すると、他の多くのオプション (すべて可視性に関係するもの) が true に設定されます。 例えば、カスタム投稿タイプは表示されるが、問い合わせはできないようにすることができます。 -
menu_positionバックエンドでのカスタム投稿タイプメニューの位置を定義します。 -
supportsこのオプションは、カスタム投稿タイプの編集画面で利用可能なデフォルトの WordPress コントロールを設定します。 デフォルトでは、タイトルフィールドとエディタのみが表示されます。 コメント、リビジョン、投稿フォーマットなどのサポートを追加したい場合は、ここで指定する必要があります。 完全なリストについては、Codexのargumentsセクションを参照してください。 -
has_archivetrueに設定すると、書き換えルールが作成され、http://mysite.com/posttype/での投稿タイプのアーカイブが可能になります(デフォルト)

この設定を行うと、カスタム投稿タイプのメニューエントリが表示されるはずです。
先ほど述べたように、投稿タイプを作成する際に変更できることはたくさんあります。
カスタム インタラクション メッセージ
WordPressは、ユーザーのアクションによって引き起こされる多くのメッセージを生成します。 バックエンドでの更新、公開、検索などはすべて、デフォルトでは、通常の投稿に合わせたメッセージにつながります。
function my_updated_messages( $messages ) { global $post, $post_ID; $messages = array( 0 => ’, 1 => sprintf( __('Product updated. <a href="%s">View product</a>'), esc_url( get_permalink($post_ID) ) ), 2 => __('Custom field updated.'), 3 => __('Custom field deleted.'), 4 => __('Product updated.'), 5 => isset($_GET) ? sprintf( __('Product restored to revision from %s'), wp_post_revision_title( (int) $_GET, false ) ) : false, 6 => sprintf( __('Product published. <a href="%s">View product</a>'), esc_url( get_permalink($post_ID) ) ), 7 => __('Product saved.'), 8 => sprintf( __('Product submitted. <a target="_blank" href="%s">Preview product</a>'), esc_url( add_query_arg( 'preview', 'true', get_permalink($post_ID) ) ) ), 9 => sprintf( __('Product scheduled for: <strong>%1$s</strong>. <a target="_blank" href="%2$s">Preview product</a>'), date_i18n( __( 'M j, Y @ G:i' ), strtotime( $post->post_date ) ), esc_url( get_permalink($post_ID) ) ), 10 => sprintf( __('Product draft updated. <a target="_blank" href="%s">Preview product</a>'), esc_url( add_query_arg( 'preview', 'true', get_permalink($post_ID) ) ) ), ); return $messages;}add_filter( 'post_updated_messages', 'my_updated_messages' );
見てわかるように、これはメッセージを管理する上で最も使いやすい方法ではありません。
この単一の関数を使用して、すべてのカスタム投稿タイプのメッセージを変更できることに注目してください。 $messagesの配列には、すべての投稿タイプのメッセージが格納されているので、ここですべてを変更できます。
コンテキスト ヘルプ
めったに実装されていない機能として、カスタマイズされたコンテキスト ヘルプがあります。
文脈上のヘルプ機能は、ページの右上に表示されている下降タブです。
function my_contextual_help( $contextual_help, $screen_id, $screen ) { if ( 'product' == $screen->id ) { $contextual_help = '<h2>Products</h2> <p>Products show the details of the items that we sell on the website. You can see a list of them on this page in reverse chronological order - the latest one we added is first.</p> <p>You can view/edit the details of each product by clicking on its name, or you can perform bulk actions using the dropdown menu and selecting multiple items.</p>'; } elseif ( 'edit-product' == $screen->id ) { $contextual_help = '<h2>Editing products</h2> <p>This page allows you to view/modify product details. Please make sure to fill out the available boxes with the appropriate details (product image, price, brand) and <strong>not</strong> add these details to the product description.</p>'; } return $contextual_help;}add_action( 'contextual_help', 'my_contextual_help', 10, 3 );これも少し難しいのですが、現在表示されている画面の ID を知る必要があります。 $screenという変数の内容をプリントアウトすれば、簡単にIDがわかるはずです。 これは、すべてのカスタム投稿タイプのコンテキスト ヘルプを一度に変更するために使用できる関数でもありますが、個人的には、これを前の 2 つのブロックと一緒にグループ化し、一度に 1 つのカスタム投稿タイプにのみ使用することをお勧めします。 register_post_type()contextual_helppost_updated_messages – を使用して、役立つガイダンスと関連するメッセージをそれぞれ作成しました。
カスタム タクソノミー
通常のブログの投稿では、カテゴリとタグを使用して組織構造を作成します。 しかし、カスタム投稿タイプでは、同じ構成が必ずしも意味をなさないのです。 例えば、「人生」、「考え」、「夢」といった内容のブログ記事があります。
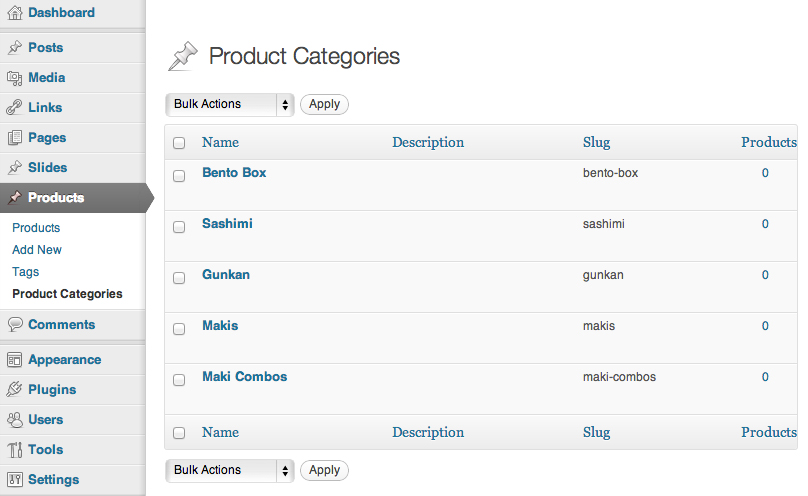
これが、開発者がカスタム タクソノミーを作成するきっかけとなった問題です。 製品カテゴリー」という名前の別のタクソノミーを作成して、製品にのみ使用するカテゴリーを収容することができます。
function my_taxonomies_product() { $args = array(); register_taxonomy( 'product_category', 'product' $args );}add_action( 'init', 'my_taxonomies_product', 0 );カスタム投稿タイプと同様に、タクソノミーは非常に簡単に作成できますが、自分のニーズに合わせるためには少し工夫が必要です。 カスタムタクソノミーは、デフォルトで公開されているため、最初から少し良い動作をします。 カスタマイズされた例を見てみましょう。
function my_taxonomies_product() { $labels = array( 'name' => _x( 'Product Categories', 'taxonomy general name' ), 'singular_name' => _x( 'Product Category', 'taxonomy singular name' ), 'search_items' => __( 'Search Product Categories' ), 'all_items' => __( 'All Product Categories' ), 'parent_item' => __( 'Parent Product Category' ), 'parent_item_colon' => __( 'Parent Product Category:' ), 'edit_item' => __( 'Edit Product Category' ), 'update_item' => __( 'Update Product Category' ), 'add_new_item' => __( 'Add New Product Category' ), 'new_item_name' => __( 'New Product Category' ), 'menu_name' => __( 'Product Categories' ), ); $args = array( 'labels' => $labels, 'hierarchical' => true, ); register_taxonomy( 'product_category', 'product', $args );}add_action( 'init', 'my_taxonomies_product', 0 );見ての通り、あまり大きな変更はありません。 いくつかのラベルを追加し、hierarchical オプションを true に設定しました。 これにより、「カテゴリースタイル」のタクソノミが有効になります。
他にもいくつかの強力なオプションがありますが、それらについては Leary 氏の記事を読むか、register_taxonomy()の Codex エントリを参照してください。
Post Meta Boxes
メタボックスとは、WordPressの編集画面で表示される、ドラッグ可能なボックスのことです。
メタボックスは、組み込みのカスタムフィールドボックスよりもはるかにユーザーフレンドリーな方法でカスタムフィールドデータを管理するために使用される傾向があります。
Justin Tadlock 氏は、Smashing Magazine でカスタム メタ ボックスのすべてを網羅した記事を書いています。
meta box を作成するには、次の 3 つのステップが必要です。
- ボックス自体の定義、
- meta box のコンテンツの定義、
- ボックスからのデータの処理方法の定義。
メタボックスの定義
add_action( 'add_meta_boxes', 'product_price_box' );function product_price_box() { add_meta_box( 'product_price_box', __( 'Product Price', 'myplugin_textdomain' ), 'product_price_box_content', 'product', 'side', 'high' );}上記のコードでは、以下のパラメーター(指定された順)でメタボックスを作成します。
- メタボックスの一意の識別子(関数名と一致する必要はありません)、
- メタボックスのタイトル(ユーザーに表示されます)、
- ボックスの内容を表示する関数です。
- メタボックスが属する投稿タイプ、
- メタボックスの配置、
- メタボックスの優先度(「どのくらいの高さ」に配置されるかを決定します)。
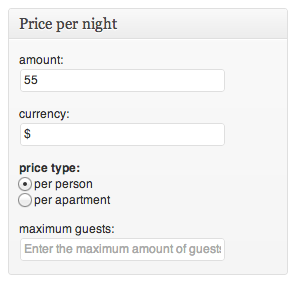
メタボックスのコンテンツの定義
function product_price_box_content( $post ) { wp_nonce_field( plugin_basename( __FILE__ ), 'product_price_box_content_nonce' ); echo '<label for="product_price"></label>'; echo '<input type="text" name="product_price" placeholder="enter a price" />';}これは価格だけを格納するシンプルなボックスなので、それを管理するためのラベルと入力を作成しています。
提出されたデータの処理
ほとんどの場合、データをカスタム フィールドとして保存したいと思うでしょうが、この方法に限定されるわけではありません。 しかし、この方法に限定されるものではありません。入力したデータを使ってサードパーティのAPIを呼び出したり、XMLファイルを生成したりすることができます。
add_action( 'save_post', 'product_price_box_save' );function product_price_box_save( $post_id ) { if ( defined( 'DOING_AUTOSAVE' ) && DOING_AUTOSAVE ) return; if ( !wp_verify_nonce( $_POST, plugin_basename( __FILE__ ) ) ) return; if ( 'page' == $_POST ) { if ( !current_user_can( 'edit_page', $post_id ) ) return; } else { if ( !current_user_can( 'edit_post', $post_id ) ) return; } $product_price = $_POST; update_post_meta( $post_id, 'product_price', $product_price );}この機能の最大の特徴は、安全性にあります。 まず、自動保存が実行されている場合、ユーザーが実際にフォームを送信していないため、何も起こりません。 次にnonceのチェック、そしてパーミッションのチェックが行われます。
Displaying Your Content
上記のすべてにはさまざまなニュアンスがありますが、基本的なことは理解しているはずです。 後は、今あるデータを実際に使用して、ユーザーに何かを表示するだけです。
投稿の表示
has_archive パラメータを「true」に設定して投稿タイプを作成した場合、WordPress はその投稿タイプのアーカイブ ページに投稿を表示します。
このページでは、archive-.phparchive-books.phparchive-books.php)。
カスタム投稿タイプのコンテンツを表示する別の方法として、WP_Queryクラスのカスタムクエリを使用する方法があります。
<?php $args = array( 'post_type' => 'product', 'tax_query' => array( array( 'taxonomy' => 'product_category', 'field' => 'slug', 'terms' => 'boardgames' ) ) ); $products = new WP_Query( $args ); if( $products->have_posts() ) { while( $products->have_posts() ) { $products->the_post(); ?> <h1><?php the_title() ?></h1> <div class='content'> <?php the_content() ?> </div> <?php } } else { echo 'Oh ohm no products!'; } ?>メタデータの表示
メタデータは、get_post_meta()product_priceという名前のポストメタフィールドを保存しました。
<?php // If we are in a loop we can get the post ID easily $price = get_post_meta( get_the_ID(), 'product_price', true ); // To get the price of a random product we will need to know the ID $price = get_post_meta( $product_id, 'product_price', true );?>おわりに
このように、CMS の作成は、WordPress のコントロールと機能のモジュール化された性質のため、非常に簡単です。
メタボックスのコンテンツを定義するのは完全にあなた次第なので、コントロールのための追加機能を作成する力があり、あなたやあなたのクライアントをとても喜ばせることができます。
さらに一歩進んで、カスタム管理ページや完全にカスタムされたコンテンツを作成することもできますが、それはまた別の機会にお話しましょう。